Beginner’s tips for building a perfect shed

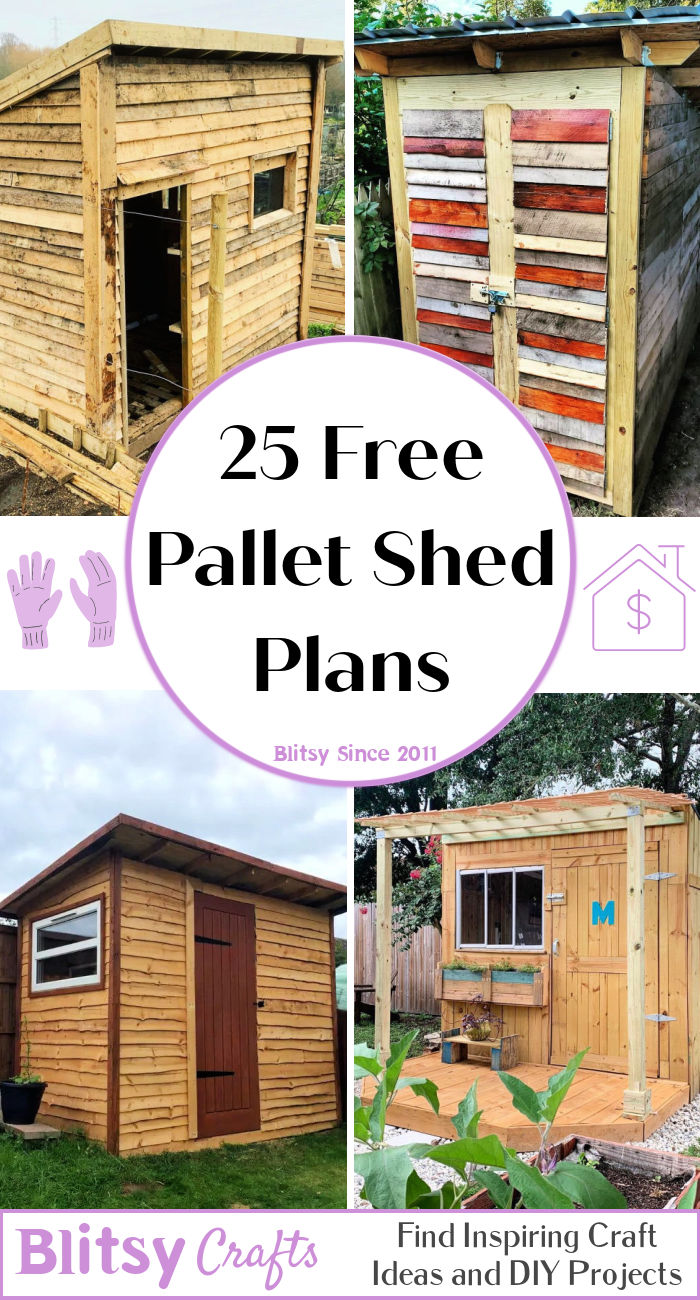
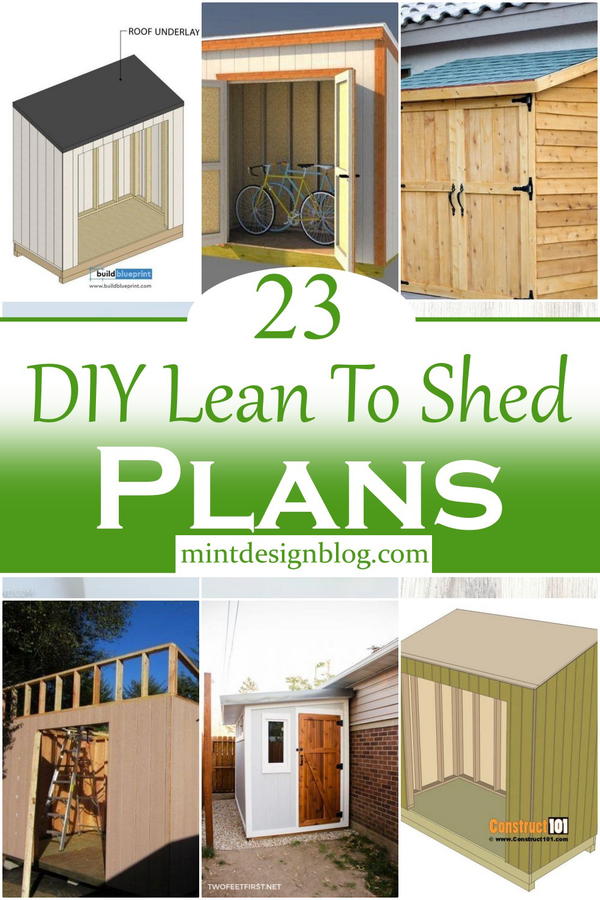
Building Your Dream Shed: A Beginner's Guide

Constructing a shed might seem daunting, but with careful planning and these beginner-friendly tips, you can build a sturdy and beautiful structure you'll be proud of. This guide breaks down the process into manageable steps, empowering you to tackle this rewarding DIY project.

Planning Your Perfect Shed

Before you even touch a tool, meticulous planning forms the foundation of a successful shed build. Start by determining the shed's purpose. Will it store gardening equipment, tools, or perhaps serve as a small workshop? This dictates the size and features you'll need. Consider the location carefully. Choose a level, well-drained spot with easy access. Check local building codes and regulations â€" you might need permits depending on your shed's size and location. Finally, sketch a detailed plan, including dimensions, door placement, window placement, and any additional features you desire. This plan serves as your roadmap throughout the construction process. Don't underestimate the value of a clear plan; it saves time and avoids costly mistakes.

Choosing the Right Materials

Selecting high-quality materials significantly impacts your shed's longevity and durability. Opt for pressure-treated lumber for the foundation and framing to withstand the elements. Consider using composite materials for siding, as they require less maintenance. For the roof, asphalt shingles offer a cost-effective and long-lasting solution. Research different options and compare prices before making your purchases. Remember, investing in quality materials saves you money and frustration in the long run.

Laying the Foundation: A Solid Start

A strong foundation is critical for a stable and long-lasting shed. Begin by leveling the ground thoroughly using a spirit level and removing any debris or vegetation. For smaller sheds, a concrete slab provides an excellent, level base. Alternatively, you can create a gravel base by compacting a layer of gravel followed by a layer of landscape fabric to prevent weed growth. Ensure the base is large enough to accommodate your shed's dimensions, leaving some extra space for error. Remember to always follow manufacturer's instructions for your chosen base type. A properly constructed foundation ensures your shed stands the test of time.

Framing and Construction: Bringing Your Vision to Life

Framing your shed involves building the skeleton that supports the walls and roof. Cut and assemble the lumber according to your plan, paying close attention to squareness and accuracy. Use appropriate fasteners, like galvanized nails or screws, ensuring every joint is secure. Construct the walls in sections before raising them, ensuring they're plumb and properly aligned. Regularly check your measurements and alignment using a spirit level and a measuring tape to prevent issues later on. Building the frame meticulously forms the crucial backbone of your shed.

Adding the Roof and Siding

Once the walls are up, install the roof trusses or rafters, ensuring they are properly spaced and aligned. Add your chosen roofing material according to the manufacturer’s instructions. Finally, install the siding, carefully aligning each piece for a professional finish. Pay attention to detail at this stage, as the siding protects your shed from the elements. Choose a siding that suits your aesthetic preferences and provides adequate protection. A well-constructed roof and siding protect your shed from the elements for years to come.

Finishing Touches: The Perfect Polish

After completing the main structure, add the finishing touches that make your shed truly special. Install the doors and windows, ensuring they operate smoothly. Consider adding shelves, hooks, or workbenches inside to maximize storage and functionality. Apply a sealant or paint to protect the wood from rot and moisture. A final coat of paint adds both protection and aesthetic appeal. These final touches transform your shed into a functional and visually appealing space.

Essential Tools and Safety Precautions

Safety first! Always wear appropriate safety gear, including safety glasses, work gloves, and sturdy footwear. Gather your necessary tools in advance, including a measuring tape, level, saw, hammer, drill, and appropriate fasteners. Having everything readily available streamlines your workflow. Remember to take regular breaks and prioritize safety throughout the entire building process. A safe and organized approach ensures a smooth and successful project.

Building a shed is a rewarding experience. With careful planning, attention to detail, and a commitment to safety, you can create a durable and functional space that enhances your property and serves your needs for years to come.

Share:

DIY backyard shed with loft for storage

Build Your Dream Backyard Shed with Loft: A Comprehensive DIY Guide

Tired of clutter overflowing your garage and house? Yearning for a dedicated space to store your gardening tools, seasonal decorations, or even a workshop? Building your own backyard shed with a loft is a rewarding project that maximizes storage and adds value to your property. This comprehensive guide provides a step-by-step approach, empowering you to create the perfect storage solution tailored to your needs. Get ready to roll up your sleeves and transform your outdoor space!

Planning Your Shed: Foundation to Finish

Before you even pick up a hammer, meticulous planning ensures a smooth build. Start by determining the desired dimensions of your shed. Consider the available space in your backyard and the amount of storage you need. Will you primarily use it for gardening supplies, or do you envision a mini-workshop? A larger shed allows for a more spacious loft. Next, obtain the necessary building permits from your local authority. This crucial step avoids potential fines and ensures your shed complies with local regulations. Finally, sketch a detailed plan, including the dimensions, door placement, window placement (if any), and loft access. Consider the style, from a classic gable roof to a more modern design, choosing materials that complement your home's aesthetic.

Gathering Materials and Tools: Equipping Your Workshop

Building a shed requires a variety of materials and tools. Create a comprehensive list to avoid mid-project delays. Essential materials include pressure-treated lumber for the foundation and framing, plywood for the walls and roof, roofing felt, shingles or metal roofing, and screws or nails. For the loft, you'll need additional lumber for the floor joists and flooring. Don't forget the hardware like hinges, handles, and a lock. Essential tools include a measuring tape, level, saw (circular saw or hand saw), drill, hammer, screwdriver, and safety glasses. Investing in a quality spirit level ensures accurate construction and avoids future issues. Consider renting power tools if you don't own them, saving you money compared to purchasing equipment you may only use once.

Material List Checklist:

  • Pressure-treated lumber (various sizes)
  • Plywood sheets
  • Roofing felt
  • Shingles or metal roofing
  • Screws/Nails
  • Hinges
  • Handles & Locks
  • Concrete (for foundation)

Construction Phase: From Foundation to Loft

With your materials and tools assembled, you're ready to begin construction. Begin by preparing a level foundation. This could be a concrete slab, a gravel base, or even treated lumber. A level foundation is paramount for a stable and long-lasting shed. Next, erect the frame using the pressure-treated lumber, ensuring all corners are square and plumb. Once the frame is complete, sheathe the walls with plywood, paying attention to proper alignment and fastening techniques. Install the roof structure according to your chosen design, ensuring it's securely fastened and weathertight. Finally, install the roofing material, making sure it's properly sealed to prevent leaks. Constructing the loft involves building a support framework before adding the plywood floor. Ensure sufficient headroom and use sturdy materials to support the weight of your stored items.

Finishing Touches: Adding the Personal Element

Once the main structure is complete, add the finishing touches to personalize your shed. Install the doors and windows, ensuring they operate smoothly. Paint or stain the exterior to protect the wood and enhance the aesthetic appeal. Consider adding extra features like shelves for improved storage or a workbench for a workshop setting. Remember to install proper ventilation to prevent moisture buildup. A well-ventilated shed protects stored items and prolongs the life of the structure. Finally, add a lock for security, safeguarding your valuable belongings.

Building your own backyard shed with a loft is a challenging but supremely satisfying project. By following this guide, you can confidently tackle this undertaking and create a valuable addition to your property. Enjoy the process, and revel in the organizational bliss your new shed provides!

Share:

Cost-effective shed projects for first-timers

Building Your Dream Shed on a Budget: A First-Timer's Guide

So, you're dreaming of a shed? A place to stash your gardening tools, a workshop for your creative projects, or maybe just a quiet retreat? That’s awesome! But the thought of building one yourself might seem daunting, especially if you're a first-timer. Don't worry, I've got you covered. This guide is all about building a cost-effective shed that won't break the bank or your spirit.

Building your own shed can be incredibly rewarding. You get exactly what you want, tailored to your specific needs and budget. Plus, it’s a fantastic way to learn some new skills! Let's dive into how to make this dream a reality without emptying your wallet.

Planning Your Budget-Friendly Shed

Before you even think about hammering a nail, you need a plan, and that plan needs to include a realistic budget. Don't skip this step! Underestimating costs is a common mistake that can lead to frustration and an unfinished project.

Breaking Down the Costs

Let’s break down the major expenses you'll encounter:

  • Materials: This is the biggest chunk of your budget. Think lumber, roofing materials, screws, nails, hinges, and any other hardware you’ll need. We'll talk more about choosing cost-effective materials later.
  • Tools: Do you already own the necessary tools? If not, renting might be cheaper than buying, especially if it’s a one-time project. Consider borrowing from friends or family too!
  • Permits: Check your local building codes and regulations. You might need permits, and the fees can vary significantly depending on your location and the size of your shed.
  • Foundation: A simple gravel base is the most budget-friendly option, but a concrete slab will offer more durability. Consider your climate and soil conditions when choosing.

Create a detailed spreadsheet to track your estimated and actual expenses. It’s a lifesaver in keeping you organized and on track.

Choosing the Right Shed Design

Simplicity is key when aiming for cost-effectiveness. A smaller, simpler shed design will require fewer materials and less labor. Think about what you actually *need* the shed for. Do you really need all those fancy features? Probably not for a first project!

Simple Shed Designs for Beginners

Consider these straightforward designs:

  • A-Frame Shed: This is a classic and relatively easy design to build. It's great for smaller sheds and requires less complex framing.
  • Lean-To Shed: This design is attached to an existing structure, like a house or garage. It's super simple and often requires less material.
  • Small Gable Shed: A slightly more complex version of the A-frame, offering more headroom and storage space.

Plenty of free plans are available online. Just do a quick search for "free shed plans for beginners," and you'll find a wealth of options to choose from. Remember to carefully review the plans before you start building to make sure you understand every step.

Smart Material Choices

Cutting corners doesn't mean compromising on quality; it means being smart about your choices. Here's how to save money on materials without sacrificing structural integrity:

Choosing the Right Lumber

Pressure-treated lumber is essential for the foundation and any parts that will be in contact with the ground. However, you don't necessarily need pressure-treated lumber for the entire structure. Consider using less expensive lumber for the walls and roof, ensuring it’s properly sealed and protected from the elements.

Repurposed and Recycled Materials

Get creative! Look for reclaimed wood, salvaged materials, or even repurpose old pallets (ensure they're treated wood and free of harmful chemicals). This can dramatically reduce your material costs, and it's environmentally friendly too!

Roofing Options

Metal roofing is durable, long-lasting, and relatively inexpensive. It’s a great option for budget-conscious builders. Shingles are also an option, but they can be more expensive.

Tools of the Trade (Without Breaking the Bank)

You don't need a full-blown workshop to build a shed. Start by making a list of essential tools. You might be able to borrow some tools from friends or family, and renting is always an option. Consider the following:

  • Measuring tape
  • Level
  • Hammer
  • Screwdriver (or drill/driver)
  • Saw (circular saw or hand saw)
  • Safety glasses and gloves

Remember, safety first! Always wear appropriate safety gear when working with tools and materials.

Building Your Shed: A Step-by-Step Approach

Once you have your plans, materials, and tools, it's time to build! This is where following your chosen plans carefully becomes crucial. Take your time, double-check your measurements, and don’t be afraid to ask for help if you get stuck. Many online forums and communities offer support and advice to DIYers.

Remember, building a shed is a process. Enjoy the journey! Celebrate your progress along the way. That sense of accomplishment will be incredibly rewarding.

Commonly Asked Questions

  • Q: How long will it take to build a shed? A: This depends on the size and complexity of the shed, your experience level, and the time you can dedicate to the project. A simple shed could take a weekend, while a more complex one might take several weeks.
  • Q: Can I build a shed without any prior experience? A: Absolutely! Start with a simple design and follow detailed plans carefully. Don’t be afraid to ask for help from more experienced builders or online communities.
  • Q: What if I make a mistake? A: Don't panic! Mistakes happen. Sometimes you can fix them easily, and sometimes you might need to adjust your plans slightly. The important thing is to learn from your mistakes and keep going.
  • Q: How much will it cost? A: The cost varies significantly depending on the size, materials, and complexity of the shed. However, with careful planning and smart choices, you can build a functional shed for a few hundred dollars.
  • Q: Where can I find free shed plans? A: A simple Google search for "free shed plans for beginners" will yield many results. Just be sure to review the plans carefully before you begin.

Building a shed is a fantastic project that combines skill-building, cost savings, and a huge sense of accomplishment. So go for it, and enjoy the process!

Share:

Easy backyard shed ideas for new builders

Easy Backyard Shed Ideas for New Builders

Building your first backyard shed can feel daunting, but with the right approach, it's a manageable and rewarding project. Forget complex designs and expensive materials; this guide focuses on simple, achievable shed plans perfect for novice builders. We'll cover straightforward designs, essential tools, and helpful tips to get you started on your own personalized outdoor storage solution. Let's transform that unused corner of your yard into a functional and aesthetically pleasing space!

Choosing Your Shed Style: Simplicity is Key

Selecting a shed style is the first step. Avoid intricate designs for your initial project. Instead, opt for simple, classic shapes that are easy to construct. A rectangular shed is the easiest to build; its straightforward design minimizes complicated angles and cuts. Its simple, boxy shape makes calculating materials straightforward and minimizes the need for specialized carpentry skills. The classic A-frame design, while slightly more complex, remains relatively easy to manage for beginners as it requires basic geometry. Consider the size carefully; a smaller shed is significantly easier to build and manage than a large one.

Materials to Consider

For your first shed, prioritize ease of use. Pressure-treated lumber is a fantastic choice due to its durability and resistance to rot and insects. It requires less maintenance than other materials. Consider pre-cut lumber kits for even greater simplicity, as they eliminate the need for detailed cutting and measuring. For roofing, asphalt shingles are relatively inexpensive, readily available, and easy to install. Finally, remember to select appropriate hardware: galvanized nails and screws will withstand the elements.

Essential Tools and Preparation

Gathering the right tools before you begin is crucial for a smooth building process. Invest in a quality measuring tape, level, and saw (circular saw or hand saw). You'll also need a hammer, drill, and screwdriver. A post-hole digger will make setting posts easier and faster. Safety gear is non-negotiable; always wear safety glasses and work gloves. Before you begin construction, ensure you obtain the necessary permits from your local authority. Plan your shed's location carefully, considering access to utilities and proximity to your house.

Step-by-Step Construction Guide (Simplified)

A basic shed build typically follows these steps:

  1. Prepare the foundation: level the ground and create a base using concrete piers, gravel, or a wooden platform.
  2. Erect the frame: assemble the walls, using pre-cut lumber if possible. Ensure everything is square and level.
  3. Install the roof: Construct and attach the rafters, then add roofing materials.
  4. Add siding and trim: cover the exterior walls with your chosen siding.
  5. Install the door and windows: measure and attach these components carefully.
  6. Apply finishing touches: add paint or stain for protection and aesthetics.

Adding Personal Touches

Once the basic shed is complete, personalize it to reflect your style. Add a small window for natural light. Consider painting it a vibrant color or adding decorative trim. A simple potting bench inside can transform it into a mini-garden shed. You could even install simple shelving units to maximize storage space. The possibilities are endless, and your creativity can truly shine here!

Building your own backyard shed is a fantastic way to enhance your property and learn valuable DIY skills. By following these tips and choosing a simple design, you can confidently create a functional and attractive storage solution without feeling overwhelmed. Remember to take your time, enjoy the process, and celebrate your accomplishment once it's finished!

Share:

Wood Pallet Shed Plans: Build a Practical Storage Shed on a Budget

Wood Pallet Shed Plans: Build a Practical Storage Shed on a Budget

Wood Pallet Shed Plans: Build a Practical Storage Shed on a Budget

Tired of cluttered garages and overflowing storage spaces? Dreaming of a neat, organized outdoor shed without breaking the bank? Then look no further! This guide provides comprehensive plans for building a practical and surprisingly stylish storage shed using repurposed wood pallets. Forget expensive pre-fabricated sheds â€" you can build your own sturdy and attractive structure for a fraction of the cost, all while enjoying a rewarding DIY project.

Assessing Your Needs and Resources

Before diving into the construction, carefully plan your project. Consider the dimensions of your desired shed. How much storage space do you actually need? Measure the area where you intend to build. Ensure you have adequate space for both the shed itself and comfortable access. You’ll also need to check local building codes and obtain any necessary permits. Remember to factor in the terrain; a level foundation is crucial for stability. Next, source your pallets. Inspect them meticulously; choose sturdy pallets free from rot, significant damage, or pest infestation. You'll likely need a significant number, depending on the desired size of your shed.

Gathering Tools and Materials

Building a pallet shed requires specific tools and materials. Essential tools include: a hammer, crowbar, saw (circular saw recommended for speed and precision), drill with various drill bits, level, measuring tape, safety glasses, work gloves, and a nail gun (optional, but highly recommended for efficiency). Regarding materials, besides the pallets themselves, you'll need screws (galvanized for outdoor durability), pressure-treated lumber for the foundation (if necessary), roofing materials (e.g., corrugated metal sheets, asphalt shingles), and any desired finishing touches like paint or stain for weather protection and aesthetic appeal. Consider purchasing a heavy-duty tarp for protection during construction.

Constructing the Pallet Shed Frame

Begin by creating a solid foundation. Depending on your soil conditions, you might need a simple concrete slab or a level base of pressure-treated lumber. Once the foundation is secure, start assembling the pallet walls. Carefully dismantle the pallets to acquire usable planks. Remove any protruding nails or staples to prevent injuries. Assemble the planks vertically or horizontally to create sturdy walls, ensuring you create strong, interconnected framing. You might need to add extra support beams to strengthen the structure, especially for larger sheds. Securely fasten all components using screws for maximum durability. Pay close attention to square corners; use a speed square to ensure perfect 90-degree angles.

Roof Construction

The roof design is pivotal for weather protection. A simple gable roof is ideal for beginners and offers excellent water runoff. Construct the roof frame using additional pressure-treated lumber, ensuring sufficient overhang to protect the walls from rain. Securely attach the chosen roofing material to the frame, ensuring a watertight seal. Overlap roofing sheets appropriately to prevent leaks. Always follow the manufacturer's instructions for your specific roofing material.

Finishing Touches and Customization

Once the structure is complete, consider adding finishing touches to enhance both functionality and aesthetics. Apply a weather-resistant sealant or paint to protect the wood from the elements. Adding a door and a window will enhance usability and ventilation. You can customize your shed with features like shelves for added storage, a work bench, or even a small lean-to. Remember that creativity is key; let your personal style shine through!

Safety First!

Throughout the entire building process, prioritize safety. Always wear safety glasses and work gloves. Use caution when handling power tools and ensure proper ventilation if working with paint or sealant. If you're unsure about any aspect of the construction, seek assistance from a qualified builder. Remember, safety should always be your top priority.

Building a pallet shed offers a unique opportunity to create a practical and cost-effective storage solution. This project not only saves money but also allows for a creative and rewarding DIY experience. Enjoy your new, personalized storage shed!

Share:

DIY Lean-To Shed: How to Build a Functional Shed for Your Yard

DIY Lean-To Shed: How to Build a Functional Shed for Your Yard

DIY Lean-To Shed: How to Build a Functional Shed for Your Yard

Constructing a lean-to shed offers a rewarding DIY project, providing valuable additional storage space while enhancing the aesthetic appeal of your property. This comprehensive guide details the process of building a functional lean-to shed, from initial planning and material selection to the final stages of construction and finishing. Careful planning and execution are paramount to ensure a robust and long-lasting structure.

I. Planning and Design Considerations

Before commencing construction, meticulous planning is crucial. This phase involves determining the shed's size, location, and desired features. A poorly planned project can lead to structural issues, wasted materials, and ultimately, a less functional shed.

A. Determining Size and Dimensions

The shed's dimensions should align with your storage needs and the available space in your yard. Consider the items you intend to store; larger, bulkier items necessitate a larger shed. Accurate measurements are essential to ensure sufficient storage capacity while maintaining proportionality with your existing structures. Draw a detailed sketch indicating the length, width, and height of your planned lean-to.

B. Selecting the Location

Site selection directly impacts the shed's functionality and longevity. Consider the following factors:

  • Accessibility: Ensure easy access for loading and unloading items.
  • Sunlight Exposure: A partially shaded location can help mitigate temperature fluctuations inside the shed.
  • Drainage: Avoid areas prone to flooding or water accumulation. Proper drainage is essential to prevent rot and water damage.
  • Proximity to Services: Consider the proximity to power sources (if required) and water outlets.
  • Local Regulations: Check local building codes and regulations regarding shed construction, including size restrictions and permitting requirements.

C. Material Selection

The choice of materials significantly influences the shed's durability, aesthetic appeal, and overall cost. Common materials include pressure-treated lumber for the framing, plywood for sheathing, and asphalt shingles or metal roofing for the roof. Consider factors such as weather resistance, longevity, and your budget when making your selection. Opt for high-quality materials to ensure a robust and long-lasting structure.

II. Gathering Tools and Materials

A comprehensive list of tools and materials is essential for efficient construction. Acquiring all necessary items beforehand minimizes delays and interruptions during the building process.

A. Tools

  • Measuring tape
  • Level
  • Shovel
  • Post-hole digger (if necessary)
  • Circular saw
  • Drill with assorted drill bits
  • Hammer
  • Safety glasses
  • Work gloves
  • Nail gun (recommended for efficiency)
  • Safety equipment (ear protection, dust mask)

B. Materials

  • Pressure-treated lumber (for framing, posts, and supports)
  • Plywood or OSB sheathing
  • Roofing material (asphalt shingles, metal roofing, etc.)
  • Concrete mix (or alternative foundation material)
  • Nails or screws
  • Exterior-grade paint or sealant (optional)
  • Hardware (hinges, door handle, latch)

III. Foundation and Framing

A stable foundation is crucial for the long-term integrity of your lean-to shed. The framing provides the skeletal structure for the walls and roof. Careful construction of both is essential.

A. Foundation Construction

The foundation type depends on factors like soil conditions and the shed's size. Options include a concrete slab, concrete piers, or a gravel base. For smaller lean-to sheds, a gravel base might suffice. For larger structures, a concrete foundation is recommended for enhanced stability. Ensure the foundation is level and adequately sized to support the weight of the shed.

B. Framing the Walls and Roof

The framing should be constructed using pressure-treated lumber to resist rot and insect damage. Begin by erecting the supporting posts and attaching horizontal beams to create the wall framework. The roof framing involves constructing rafters that slope towards a supporting wall or structure. Ensure all framing members are securely fastened using nails or screws, and regularly check for levelness and squareness during construction. Use appropriate bracing to enhance the structural integrity of the frame.

IV. Sheathing, Roofing, and Finishing

Once the framing is complete, the next stage involves sheathing the walls and installing the roofing material. This process contributes significantly to the shed's weather resistance and overall aesthetic appeal.

A. Wall Sheathing

Plywood or OSB sheathing is typically used to cover the wall framing. Ensure the sheathing is securely attached using nails or screws, leaving minimal gaps between panels. This step provides a solid surface for exterior siding (if desired) and enhances the shed's insulation properties.

B. Roofing Installation

Install the chosen roofing material according to the manufacturer's instructions. This involves laying down underlayment (to protect against moisture) followed by the roofing shingles or metal sheets. Ensure proper overlap and sealing to prevent leaks. Securely fasten the roofing material using nails or screws.

C. Finishing Touches

This includes installing doors, windows (if desired), and adding any necessary trim or finishing details. Consider applying an exterior-grade paint or sealant to protect the wood from weather damage and enhance the shed's aesthetic appeal. Ensure all hardware, such as hinges and latches, is securely installed and functions correctly.

V. Safety Precautions

Safety should be the paramount concern throughout the entire building process. Always adhere to the following safety practices:

  • Wear appropriate safety gear, including safety glasses, gloves, and ear protection.
  • Use caution when operating power tools and follow manufacturer's instructions.
  • Ensure proper ventilation when working in confined spaces or with potentially harmful materials.
  • Maintain a clean and organized work area to prevent accidents.
  • Seek assistance when handling heavy materials or performing complex tasks.

By following these guidelines, you can successfully construct a functional and aesthetically pleasing lean-to shed that provides valuable storage space for years to come. Remember to always prioritize safety and take your time to ensure a quality build. A well-planned and carefully executed project will result in a durable and aesthetically pleasing addition to your property.

Share:

Step-by-Step Basic Shed Plans for Reliable and Durable Storage

Step-by-Step Basic Shed Plans for Reliable and Durable Storage

Building Your Dream Shed: A Step-by-Step Guide

Hey there, fellow DIY enthusiasts! So, you're thinking about building a shed? Fantastic! It's a hugely rewarding project, and the sense of accomplishment when you're finally able to use that brand new, perfectly organized storage space is unbeatable. This guide will walk you through the process of building a basic, reliable, and durable shed, perfect for storing all your garden tools, lawnmowers, or whatever treasures you need to keep safe and dry. Let's get started!

1. Planning and Preparation: Laying the Foundation for Success

Before you even think about touching a saw, planning is key. This isn’t just about measuring twice, cutting once (although that's important too!). This is about making sure you’re building a shed that's right for your needs and your location.

1.1. Determining Your Shed's Size and Purpose:

What will you be storing in your shed? This dictates the size you'll need. A small 4'x6' shed might be perfect for garden tools, while a larger 8'x10' or even bigger structure might be necessary for storing larger equipment, like a lawnmower or bicycle. Think about your current and future needs â€" you don’t want to build something too small, only to wish you'd gone bigger down the line!

1.2. Choosing a Location:

Pick a spot that's level, accessible, and ideally, close to a power source if you plan on adding lighting or power tools inside. Check local regulations regarding building permits and setbacks (how far from your property lines you need to build). Make sure the ground is relatively dry to avoid future moisture issues. You might need to level the ground, and you'll definitely want to choose a spot with good drainage.

1.3. Gathering Your Materials:

This is where a detailed materials list comes in handy! You'll need pressure-treated lumber (resistant to rot and insect damage) for the frame, flooring, and roofing. Consider using plywood for the walls and roof sheathing. Don't forget about screws, nails, roofing felt, and any other hardware you'll need for doors, windows (if you want them), and any other features. A good hardware store can help you create a complete shopping list. Remember to buy extra â€" it’s always better to have a little extra than to run short mid-project!

2. Building the Foundation: A Solid Start

A strong foundation is essential for a long-lasting shed. There are several options, ranging from simple to more complex:

2.1. The Simplest Option: A Gravel Base:

For smaller sheds on well-drained ground, a gravel base can be sufficient. This involves excavating a few inches of soil, leveling the area, and then adding a layer of compacted gravel. This provides a level surface for your floor.

2.2. Concrete Slab:

For more stability and durability, a concrete slab is a great choice. You’ll need to excavate, add gravel for drainage, and then pour a concrete slab to the desired thickness. This is a more involved process, but it provides a very solid and level base for your shed.

2.3. Concrete Piers (or Blocks):

Concrete piers or blocks are a good option for areas prone to flooding. You’ll need to dig holes, set the piers or blocks, and level them carefully. The floor framing will then rest on top of these supports.

3. Framing the Shed: Building the Skeleton

Once your foundation is set, you can start building the frame of your shed. This involves creating the floor joists, wall frames, and roof trusses.

3.1. The Floor:

Lay down pressure-treated floor joists according to your chosen design. Ensure they are level and spaced evenly. Then, attach your plywood subflooring to the joists using screws.

3.2. The Walls:

Build wall frames using pressure-treated lumber. This is typically done by constructing rectangular frames, then attaching plywood sheathing to the outside. Remember to leave openings for doors and windows.

3.3. The Roof:

The roof design can vary. A simple gable roof is common and relatively easy to construct. This involves building roof trusses (triangular support structures) and then attaching them to the top plates of the walls. You'll then add plywood sheathing to the trusses. For added strength and stability consider adding bracing to your roof during construction

4. Finishing Touches: Making it Shine

With the main structure complete, it's time for the finishing touches:

4.1. Roofing:

Apply roofing felt over the plywood sheathing to create a waterproof barrier. Then, install your chosen roofing material, such as asphalt shingles. This is important to protect your shed from the elements.

4.2. Siding (Optional):

You might want to add siding for added protection and aesthetics. Common siding options include vinyl, wood, and metal. It adds a nice, finished look.

4.3. Doors and Windows:

Install your chosen doors and windows, ensuring they are properly sealed to prevent drafts and moisture intrusion.

4.4. Finishing the Interior:

Consider adding shelves, hooks, or other storage solutions to maximize the space within your shed. A coat of paint or sealant on the interior walls can help protect them from moisture.

5. Safety First!

Throughout this process, always prioritize safety. Wear appropriate safety gear, including safety glasses, gloves, and work boots. Use caution when working with power tools. If you're unsure about any aspect of the construction, don't hesitate to seek help from a more experienced builder.

Commonly Asked Questions

Q: Do I need a building permit?

A: Building permit requirements vary by location. Check with your local authorities to determine if you need one before starting your project.

Q: What kind of wood should I use?

A: Pressure-treated lumber is recommended for its resistance to rot and insect damage. Choose a grade suitable for the specific application.

Q: How long does it take to build a shed?

A: The time required varies depending on the size and complexity of the shed, as well as your experience level. A simple shed could take a weekend, while a more complex one could take several.

Q: How much does it cost to build a shed?

A: The cost depends on the size, materials, and complexity. You can get a rough estimate by creating a materials list and getting prices from your local hardware store.

Q: Can I build a shed myself, or should I hire a contractor?

A: Many people successfully build sheds themselves. However, if you lack experience, hiring a contractor might be a better option to ensure the job is done correctly and safely.

Remember, building a shed is a rewarding experience. Take your time, plan carefully, and enjoy the process! Happy building!

Share:

Popular Posts

Powered by Blogger.

Followers

Social Icons

Recent Posts