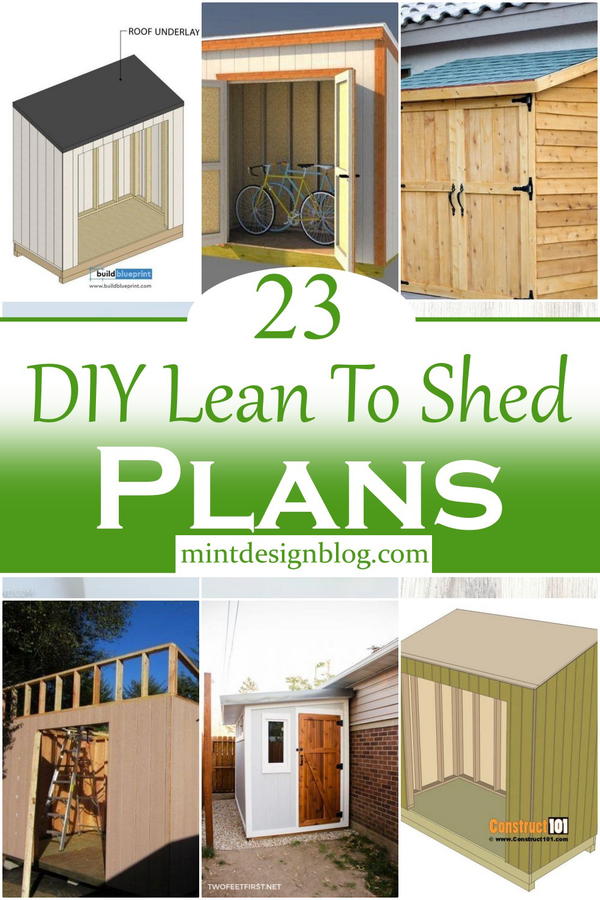
DIY Lean-To Shed: How to Build a Functional Shed for Your Yard
Constructing a lean-to shed offers a rewarding DIY project, providing valuable additional storage space while enhancing the aesthetic appeal of your property. This comprehensive guide details the process of building a functional lean-to shed, from initial planning and material selection to the final stages of construction and finishing. Careful planning and execution are paramount to ensure a robust and long-lasting structure.
I. Planning and Design Considerations
Before commencing construction, meticulous planning is crucial. This phase involves determining the shed's size, location, and desired features. A poorly planned project can lead to structural issues, wasted materials, and ultimately, a less functional shed.
A. Determining Size and Dimensions
The shed's dimensions should align with your storage needs and the available space in your yard. Consider the items you intend to store; larger, bulkier items necessitate a larger shed. Accurate measurements are essential to ensure sufficient storage capacity while maintaining proportionality with your existing structures. Draw a detailed sketch indicating the length, width, and height of your planned lean-to.
B. Selecting the Location
Site selection directly impacts the shed's functionality and longevity. Consider the following factors:
- Accessibility: Ensure easy access for loading and unloading items.
- Sunlight Exposure: A partially shaded location can help mitigate temperature fluctuations inside the shed.
- Drainage: Avoid areas prone to flooding or water accumulation. Proper drainage is essential to prevent rot and water damage.
- Proximity to Services: Consider the proximity to power sources (if required) and water outlets.
- Local Regulations: Check local building codes and regulations regarding shed construction, including size restrictions and permitting requirements.
C. Material Selection
The choice of materials significantly influences the shed's durability, aesthetic appeal, and overall cost. Common materials include pressure-treated lumber for the framing, plywood for sheathing, and asphalt shingles or metal roofing for the roof. Consider factors such as weather resistance, longevity, and your budget when making your selection. Opt for high-quality materials to ensure a robust and long-lasting structure.
II. Gathering Tools and Materials
A comprehensive list of tools and materials is essential for efficient construction. Acquiring all necessary items beforehand minimizes delays and interruptions during the building process.
A. Tools
- Measuring tape
- Level
- Shovel
- Post-hole digger (if necessary)
- Circular saw
- Drill with assorted drill bits
- Hammer
- Safety glasses
- Work gloves
- Nail gun (recommended for efficiency)
- Safety equipment (ear protection, dust mask)
B. Materials
- Pressure-treated lumber (for framing, posts, and supports)
- Plywood or OSB sheathing
- Roofing material (asphalt shingles, metal roofing, etc.)
- Concrete mix (or alternative foundation material)
- Nails or screws
- Exterior-grade paint or sealant (optional)
- Hardware (hinges, door handle, latch)
III. Foundation and Framing
A stable foundation is crucial for the long-term integrity of your lean-to shed. The framing provides the skeletal structure for the walls and roof. Careful construction of both is essential.
A. Foundation Construction
The foundation type depends on factors like soil conditions and the shed's size. Options include a concrete slab, concrete piers, or a gravel base. For smaller lean-to sheds, a gravel base might suffice. For larger structures, a concrete foundation is recommended for enhanced stability. Ensure the foundation is level and adequately sized to support the weight of the shed.
B. Framing the Walls and Roof
The framing should be constructed using pressure-treated lumber to resist rot and insect damage. Begin by erecting the supporting posts and attaching horizontal beams to create the wall framework. The roof framing involves constructing rafters that slope towards a supporting wall or structure. Ensure all framing members are securely fastened using nails or screws, and regularly check for levelness and squareness during construction. Use appropriate bracing to enhance the structural integrity of the frame.
IV. Sheathing, Roofing, and Finishing
Once the framing is complete, the next stage involves sheathing the walls and installing the roofing material. This process contributes significantly to the shed's weather resistance and overall aesthetic appeal.
A. Wall Sheathing
Plywood or OSB sheathing is typically used to cover the wall framing. Ensure the sheathing is securely attached using nails or screws, leaving minimal gaps between panels. This step provides a solid surface for exterior siding (if desired) and enhances the shed's insulation properties.
B. Roofing Installation
Install the chosen roofing material according to the manufacturer's instructions. This involves laying down underlayment (to protect against moisture) followed by the roofing shingles or metal sheets. Ensure proper overlap and sealing to prevent leaks. Securely fasten the roofing material using nails or screws.
C. Finishing Touches
This includes installing doors, windows (if desired), and adding any necessary trim or finishing details. Consider applying an exterior-grade paint or sealant to protect the wood from weather damage and enhance the shed's aesthetic appeal. Ensure all hardware, such as hinges and latches, is securely installed and functions correctly.
V. Safety Precautions
Safety should be the paramount concern throughout the entire building process. Always adhere to the following safety practices:
- Wear appropriate safety gear, including safety glasses, gloves, and ear protection.
- Use caution when operating power tools and follow manufacturer's instructions.
- Ensure proper ventilation when working in confined spaces or with potentially harmful materials.
- Maintain a clean and organized work area to prevent accidents.
- Seek assistance when handling heavy materials or performing complex tasks.
By following these guidelines, you can successfully construct a functional and aesthetically pleasing lean-to shed that provides valuable storage space for years to come. Remember to always prioritize safety and take your time to ensure a quality build. A well-planned and carefully executed project will result in a durable and aesthetically pleasing addition to your property.


No comments:
Post a Comment
Note: Only a member of this blog may post a comment.