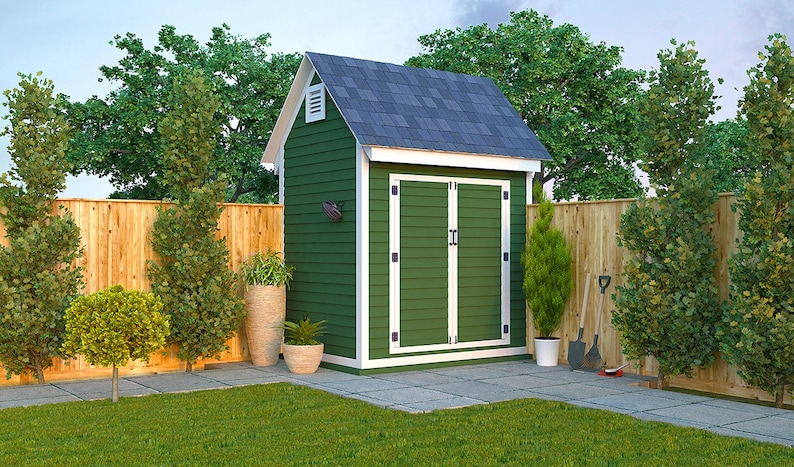
Practical and Simple 8x6 Shed Plans for Small Outdoor Spaces
The desire for additional storage space is a common challenge, particularly for homeowners with limited outdoor areas. An 8x6 shed offers a surprisingly versatile solution, providing ample room for tools, gardening equipment, bicycles, or even a small workshop, without overwhelming a compact backyard or side yard. This comprehensive guide details the planning and construction of such a structure, focusing on practicality and simplicity for DIY enthusiasts with varying levels of experience.
I. Site Preparation and Planning
Before commencing construction, meticulous planning is essential to ensure the shed’s longevity and functionality. This phase involves several crucial steps:
A. Site Selection and Assessment
Choosing the right location is paramount. Consider factors such as:
- Accessibility: Ensure easy access for materials delivery and future maintenance.
- Sunlight and Shade: Evaluate the amount of sunlight and shade the area receives throughout the day. This will impact the shed's interior temperature and the potential for mold growth.
- Drainage: Avoid low-lying areas prone to water accumulation. Proper drainage is crucial to prevent foundation damage.
- Proximity to Utilities: Maintain a safe distance from underground utilities such as gas lines, water pipes, and electrical cables. Contact your local utility companies to confirm the location of these lines before beginning excavation.
- Local Regulations: Check with your local council or homeowner's association for any building permits or regulations regarding shed construction.
B. Foundation Considerations
A robust foundation is vital for structural integrity. For an 8x6 shed, several options exist, each with varying levels of complexity and cost:
- Concrete Slab: Provides the most stable and durable foundation but requires specialized tools and skills. It's ideal for heavier sheds or areas with poor drainage.
- Gravel Base: A simpler and more affordable option. Involves excavating a level area, laying down a layer of gravel, and compacting it thoroughly. Suitable for lighter sheds in well-drained areas.
- Wooden Sleepers/Pressure-Treated Lumber: Relatively easy to install and provides a level base. Ensure the sleepers are treated to resist rot and insect infestation. Suitable for lighter sheds.
Regardless of the chosen foundation type, ensure the base is perfectly level to prevent structural problems in the future. Use a spirit level to verify the levelness throughout the process.
C. Material Selection
The choice of materials significantly impacts the shed's durability and aesthetic appeal. Consider the following:
- Pressure-Treated Lumber: Offers excellent resistance to rot and insect damage, making it ideal for the shed's frame and floor.
- Plywood or OSB Sheeting: Cost-effective options for wall and roof cladding. Ensure the plywood is exterior-grade for weather resistance.
- Roofing Material: Asphalt shingles are a popular and affordable choice, providing good protection against the elements. Metal roofing is a durable alternative, offering longer lifespan but potentially higher initial cost.
- Hardware: Choose high-quality screws, nails, hinges, and other hardware to ensure the shed's structural integrity.
II. Shed Construction: A Step-by-Step Guide
Once the site is prepared and materials gathered, the construction process can commence. This guide focuses on a simple frame construction:
A. Frame Construction
Begin by constructing the floor frame using pressure-treated lumber. Cut and assemble the frame according to your chosen dimensions, ensuring all corners are square and securely fastened. Attach the plywood or OSB sheeting to the floor frame, leaving gaps for ventilation if necessary. Next, construct the wall frames. These typically consist of vertical studs attached to a top and bottom plate. Ensure the wall frames are plumb and securely fastened.
B. Wall and Roof Assembly
Erect the wall frames onto the floor frame, ensuring they are square and plumb. Attach the wall sheeting to the frames, ensuring proper overlapping for weather tightness. Construct the roof frame using rafters or trusses, depending on your design preference and local building codes. Ensure the roof is adequately sloped to facilitate water runoff.
C. Roofing and Cladding
Install the chosen roofing material according to the manufacturer's instructions. Pay particular attention to flashing around chimneys, vents, and other penetrations to prevent leaks. Finally, apply exterior cladding to the walls and roof, ensuring all joints are weatherproofed with appropriate sealant. This step enhances the shed's aesthetic appeal and weather resistance.
D. Door and Window Installation
Install the shed's door and windows, ensuring they are securely fastened and properly sealed to prevent drafts and water ingress. Consider using high-quality hinges and locks for added security.
E. Finishing Touches
Once the main structure is complete, add any finishing touches, such as painting or staining the exterior, installing shelves or workbenches inside, and adding a padlock for security. Consider adding ventilation to reduce moisture build-up within the shed.
III. Safety Precautions
Safety should be paramount throughout the construction process. Always adhere to the following:
- Wear appropriate safety gear: This includes safety glasses, gloves, hearing protection, and sturdy work boots.
- Use proper tools and techniques: Ensure all tools are in good working order and use them correctly.
- Follow all building codes and regulations: Compliance with local regulations is crucial to ensure the safety and legality of your project.
- Work with a partner: For heavier lifting and more complex tasks, having a helper is recommended.
- Take breaks when needed: Avoid overexertion and fatigue to minimize the risk of accidents.
By carefully following these plans and prioritising safety, you can successfully construct a practical and aesthetically pleasing 8x6 shed, providing valuable additional storage space for your property. Remember to always consult local building codes and regulations before commencing construction.


No comments:
Post a Comment
Note: Only a member of this blog may post a comment.