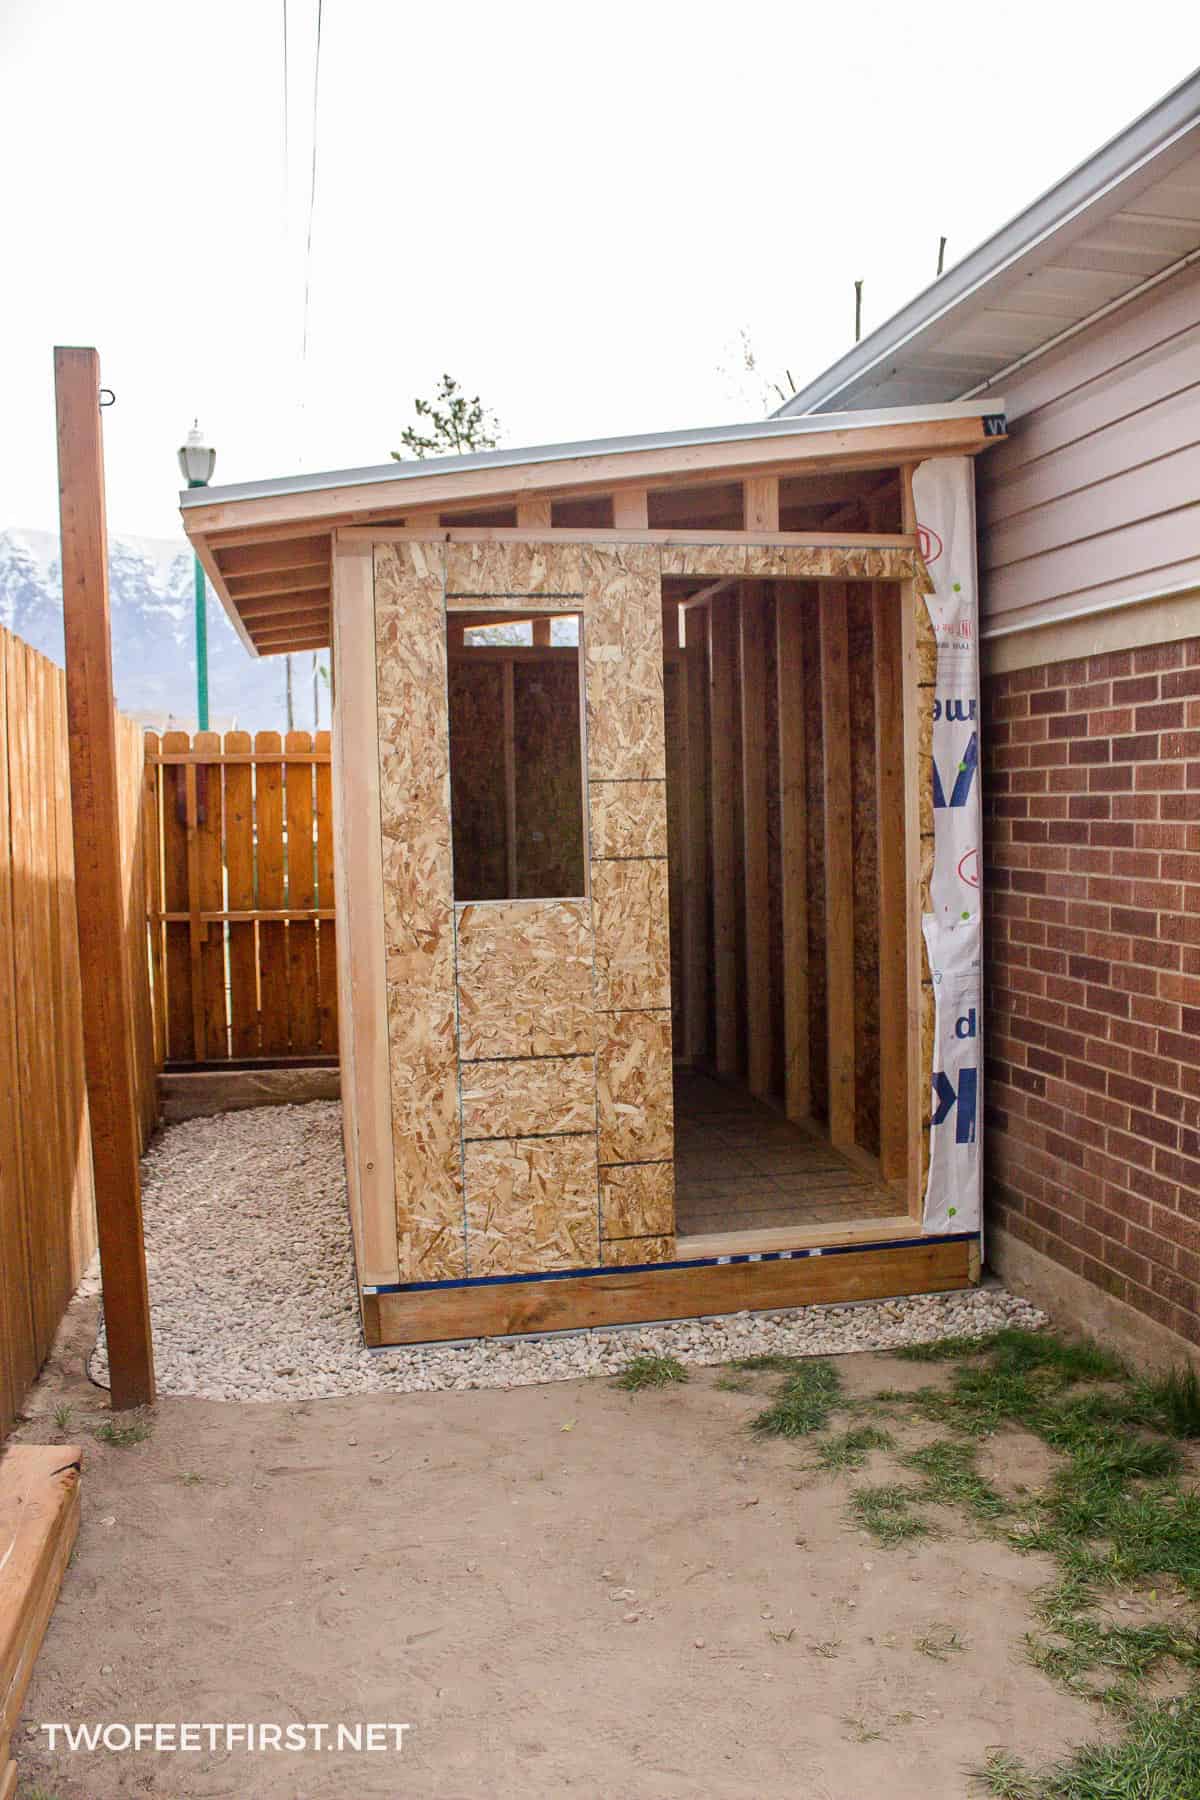
Alright, folks, let's talk sheds! Building a lean-to shed is a great way to add extra storage space to your property without breaking the bank. It's a simple, DIY project that even a beginner can handle with a little elbow grease and some helpful tips.
Planning Your Lean-To:
First things first, you need a plan. Decide where you want your lean-to to go. Consider the following:
Location, location, location! Find a level spot with good drainage. You don't want water pooling around your shed, especially in the winter.
Size matters. Think about what you'll be storing in your shed. You'll need enough space to move around comfortably and get to everything you need.
Building codes. Check with your local building department to see if there are any restrictions or permits required for your lean-to.
Materials for Your Lean-To:
Now, let's talk materials. For a basic lean-to shed, you'll need:
Foundation: For a simple lean-to, you can use treated lumber or concrete blocks to build a basic foundation.
Framing: Use 2x4 or 2x6 lumber for the frame of your shed. The size will depend on the size of your lean-to and the weight of the items you'll be storing.
Sheathing: You can use plywood, OSB, or even tongue-and-groove boards for the sheathing.
Roofing: You'll need plywood or OSB for the roof deck, and then you can choose from shingles, metal roofing, or even tar paper for the final roofing.
Doors and Windows: Choose doors and windows that fit the size of your lean-to and your storage needs.
Hardware: Don't forget the hardware! You'll need screws, nails, hinges, and whatever else you need to assemble your shed.
Building Your Lean-To:
Now, let's get down to business! Here's how to build your lean-to shed:
1. Prepare the foundation: Level the ground where you'll be building your lean-to and then lay down your foundation material. Use treated lumber, concrete blocks, or a combination of both. Make sure it's level and secure.
2. Build the walls: Start by framing the back wall of your lean-to. You'll need to cut your 2x4s to the desired length and then connect them with nails or screws. Continue framing the sides of your lean-to, making sure the walls are square and plumb.
3. Frame the roof: The roof of a lean-to is typically a simple, single slope. Start by attaching a piece of 2x4 or 2x6 lumber to the top of the back wall. This will be the "ridge" of your roof. Then, attach pieces of lumber to the sides of the lean-to, sloping down to the front of the shed. Make sure the roof framing is level and securely attached.
4. Add sheathing: Once the framing is complete, you can add the sheathing to the walls and roof. Use plywood, OSB, or tongue-and-groove boards for the sheathing. Securely attach it to the frame using nails or screws.
5. Install roofing: Once the sheathing is on, you can install the roofing. Start by laying down plywood or OSB for the roof deck. Then, install your chosen roofing material, whether it's shingles, metal roofing, or tar paper.
6. Add doors and windows: Cut openings in the walls for your doors and windows and install them according to the manufacturer's instructions.
7. Finish the exterior: Once the roof and walls are complete, you can finish the exterior of your shed. You can paint it, stain it, or even add siding to give it a more finished look.
8. Add a floor: You can add a simple floor to your lean-to using plywood or OSB. This will help keep your items off the ground and provide a more finished look.
Tips for Success:
Use a level. A level is essential for making sure your walls and roof are straight and plumb. It's one of the most important tools you'll need for this project!
Measure twice, cut once. Accuracy is key when building a shed. Take your time and double-check your measurements before making any cuts.
Get help if you need it. Don't be afraid to ask for help from friends, family, or a professional if you're not sure about something.
Enjoy the process! Building a lean-to shed is a great way to learn new skills and enjoy the satisfaction of creating something yourself.
Beyond the Basics:
Once you have your basic lean-to built, you can start adding features to personalize it. Here are some ideas:
Add shelves. Shelves are a great way to maximize storage space and keep things organized.
Install lighting. Make it easier to find things in your shed by adding some lighting.
Add a workbench. A workbench is a great place to work on projects or do repairs.
Insulate the walls and roof. This will help to keep your shed warmer in the winter and cooler in the summer.
Add a door lock. Keep your belongings safe and secure by adding a lock to your door.
Building a lean-to shed is a rewarding and affordable project that can add value to your property. With a little planning, effort, and these tips, you'll be enjoying your new storage space in no time!


No comments:
Post a Comment
Note: Only a member of this blog may post a comment.