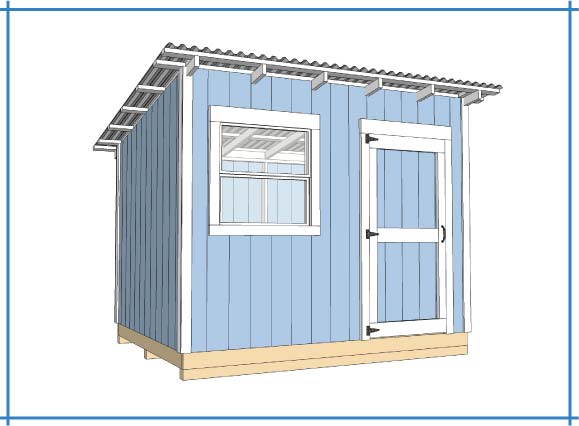
Hey there, fellow DIY enthusiasts! Tired of paying an arm and a leg for a tiny storage shed? Building your own 8x10 shed is a fantastic way to save a ton of money and have a super satisfying sense of accomplishment. It's not as intimidating as it sounds, and with a little elbow grease and some good planning, you can end up with a quality shed that fits your needs perfectly.
First, let's talk money. Hiring a contractor to build your shed can cost you thousands of dollars. You're essentially paying for their time, expertise, and materials. But with DIY, you're in control. You can choose the materials you want, find the best deals, and avoid those pesky contractor markups. This allows you to stretch your budget and potentially save up to 50% or more compared to hiring a pro.
But wait, there's more! Building your own shed lets you customize it to your exact specifications. Need extra storage space for your tools? Want to add a window for some natural light? Go for it! You can design your shed to fit your needs, unlike those pre-made sheds that often feel too cramped.
Now, let's talk about those DIY shed plans. You'll need a blueprint to guide your construction. Don't worry, you don't have to be an architect! There are tons of resources online, from free plans to paid blueprints that offer detailed instructions and diagrams.
Where to find those plans:
Free Online Resources: Check out websites like Instructables, Ana White, and Shed Plans. These often have free basic plans you can work with.
Paid Online Services: Websites like ShedPlans.com and BuildAShed.com offer more detailed and professional plans, often with different shed styles and features.
Home Improvement Stores: Many home improvement stores like Home Depot and Lowe's offer their own shed plans, often available for free or at a small cost.
Local Libraries: Don't forget about your local library! They may have books and magazines with DIY shed plans.
Once you've got your plans, it's time to gather your materials:
Wood: This is the backbone of your shed. Choose pressure-treated lumber for the foundation and floor joists, as it resists moisture and rot. For the walls and roof, you can use standard framing lumber.
Sheathing: Plywood or OSB (oriented strand board) provides structural support for your walls and roof.
Roofing: Shingles, metal roofing, or even corrugated plastic are all options. Consider your local climate and budget.
Siding: Vinyl, wood, or even metal siding can give your shed a finished look.
Doors and Windows: Choose the size and style that suits your needs.
Hardware: Don't forget about hinges, screws, nails, and other necessary hardware.
Before you start building, you'll need a solid foundation:
Concrete slab: This is the most durable and long-lasting foundation, but it also requires more work and expertise.
Concrete piers: These are a good option for level ground and can be easier to install than a full slab.
Pressure-treated skids: This is a budget-friendly option, especially if you can reuse existing skids. Just make sure they're in good condition and level.
Now, it's time to build! Follow your plans step by step. Don't rush, take your time, and don't be afraid to ask for help from friends or family.
Here's a general overview of the building process:
1. Prepare the Site: Clear the area, level the ground, and ensure it's well-drained.
2. Build the Foundation: Follow your plans to construct your chosen foundation type.
3. Frame the Walls: Cut and assemble the wall studs according to your plans.
4. Install the Floor Joists: Place the floor joists on the foundation, making sure they're level and properly supported.
5. Sheathe the Walls and Roof: Attach the plywood or OSB to the walls and roof frame.
6. Install the Roof: Construct the roof frame and secure the roofing material.
7. Add Siding: Cover the exterior walls with your chosen siding material.
8. Install Doors and Windows: Cut openings for doors and windows and install them.
9. Finish Touches: Paint or stain the exterior, add trim, and install any other finishing touches.
Don't forget about safety!
Wear safety glasses and work gloves.
Use a sturdy ladder and follow all safety guidelines.
Make sure to have proper ventilation when working with power tools.
Always double-check measurements and follow the instructions in your plans.
Remember, building a shed is a journey, not a race. Take your time, enjoy the process, and don't be afraid to ask for help if you need it. Before you know it, you'll be enjoying the fruits of your labor: a brand new, personalized shed that you built with your own two hands!
And the best part? You'll have saved a ton of money and learned valuable skills along the way. So, what are you waiting for? Grab those tools, put on your work boots, and start building your own 8x10 haven!


No comments:
Post a Comment
Note: Only a member of this blog may post a comment.